Creating an ADLS Gen2 Account
When we create a databricks instance, it automatically creates an as your blob storage account and it is mounted into the Databricks file system.
So essentially, in Databricks, when I load the files into the Databricks file system (DBFS) they’re stored in the storage account.
The Databricks file system with all of its files and directories is just a layer on top of that. It’s automatically mounted the storage account so we can access the data files without providing credentials and sign in details.
Instead, we can just provide the file path to access the data in our Databricks notebook.
But the data itself is actually stored in the underlying storage account.
When we delete the Databricks service, the storage account also gets deleted along with the files. This is because the storage account is managed by databricks, so it’s actually recommended to store your files in your own storage account and then mount it to databricks. This way when you remove the Databricks service, your storage account will still persist and I’ll show you how to do this in a later lecture in this section.
Create a storage account
So first of all, what we need to do is create a storage account.
So back in is your azure portal.
I’ll go to home. I want to create an as your data Lake Gen two storage account on as your.
As your data Lake Storage Gen2 or ADLs as it’s abbreviated, is a cloud based repository for both structured and unstructured data.
- It’s great for big data and analytic workloads.
- It provides unlimited storage for any size of data.
To create your storage account.
Let’s search for storage accounts so I can actually just click.
But this is the storage account as part of the resource group that’s automatically created with your Databricks instance.
I want to create a new storage account, so I’ll click on this plus icon here that says Create.
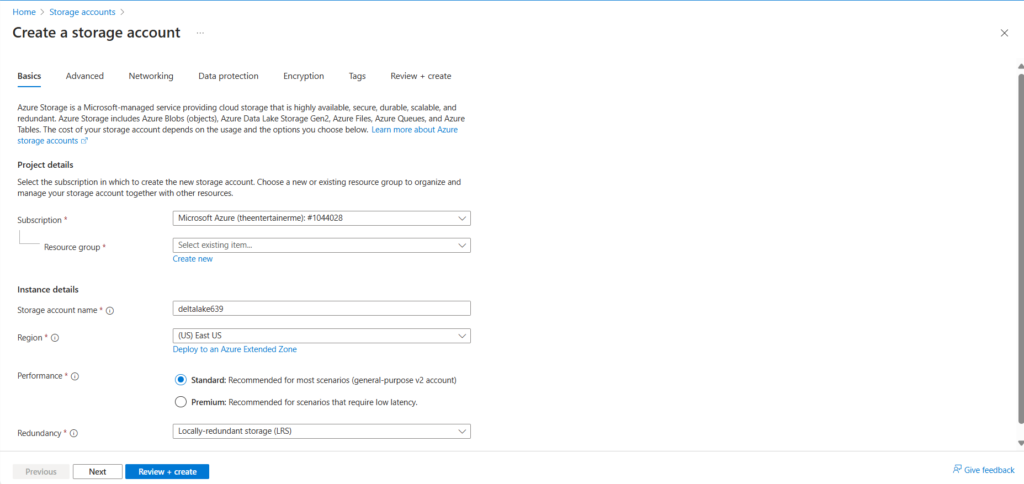
So in the basics, select the resource group and subscription. Make sure you select it.
For the resource group.
You want to select the resource group.
You can see here is my Databricks resource.
So I’ll just go back to storage accounts.
So on the storage account name, this has to be unique. So whatever storage account name I give it, you won’t be able to select because the name has to be unique.
I’ll call mine.
datalake639 and I’ll see if that’s available.
So I’ll just add some more digits.
And actually you can’t take an underscore.
So I will see if this is available.
Data.
Data Lake 639 So it looks to be available, so I’ll keep this for now.
I might have to change it.
If it’s not available for the region, I’ll change that.
So I’ll go to Europe.
And I’ll just do West Europe.
For performance or keep it as standard.
And then for redundancy, I’ll just do locally redundant storage. As that’s the lowest cost option and we don’t need any of the other options for the purposes of this course.
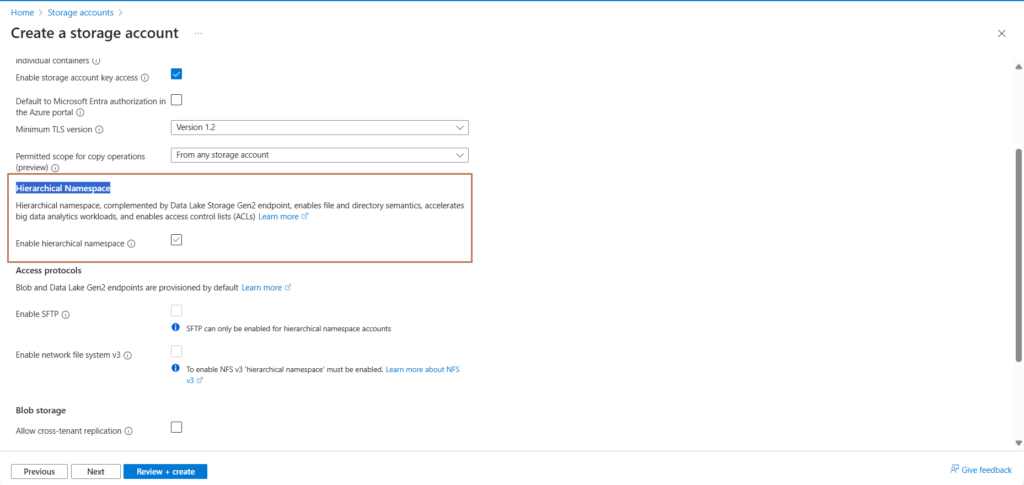
So next, I’ll go into advanced settings. I’ll keep everything here default apart from one thing, and that is Data Lake Storage Gen2.
If you tick this, you will get a Gen two storage account and that is what we’re after because that’s the latest version.
So on the data Lake Storage Gen two, check this box that enables hierarchical namespace and then you will create a data lake storage Gen two account.
I’ll then leave the remaining bits as default.
So I want to enable public access from all networks for now.
So keep it as default.
I’ll go to next.
And then review.
And then.
Create.
So in a few minutes, this should be complete.
Okay.
So as you can see, the deployment is now complete.
Okay.
So if I go back to Microsoft as your.
I go into resource groups, I click into Databricks underscore RRG.
You can see here is a storage account that I created.
So let’s click on to that.
I want to use the medallion architecture and create three containers. I want to create a bronze container for my raw files.
Note that a container is essentially like a folder. It organizes a set of blob files similar to a directory in a file system.
So under data storage, click on containers and then you can click on plus icon to create a container. So click on this plus icon and under name.
I will call it bronze and create. And then you can click into this container and upload files. So if I click on upload, I want to upload the countries CSV file and the country underscore regions
CSV file as part of the countries dataset that we used in the previous lectures.
So I’ll click on upload and then I’ll select countries CSV and country regions.
CSV.
And I’ll upload both files.
And as you can see.
Here are the files.
So now I can go up a level here.
And then if I click here, you can see we’ve got two files in the bronze container.
And I will create two additional containers, one called silver.
And then one could code.
Okay, great.
So in this lecture, we’ve created our resource Gen two storage account and uploaded files into the bronze layer.